
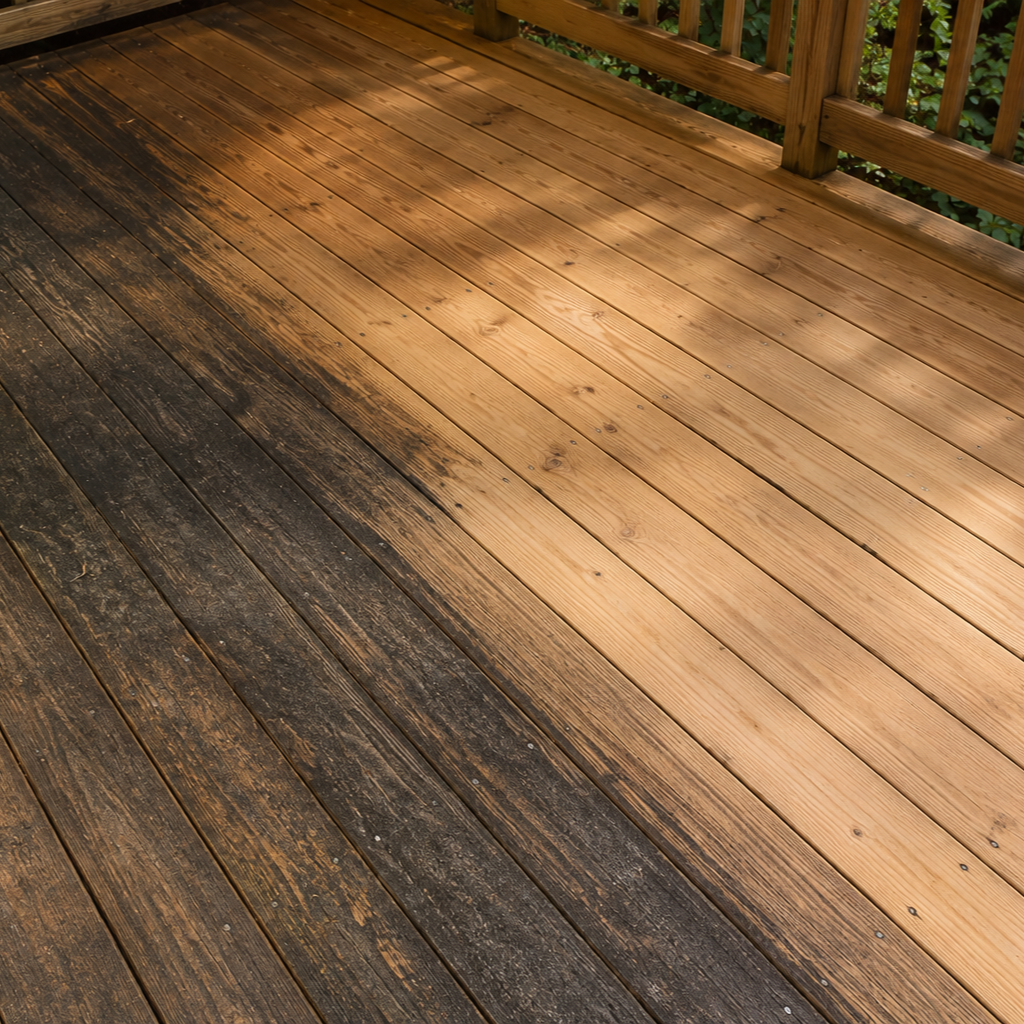
It's a Saturday morning. The stain can is on the deck. The pressure washer is rented for the day. The boards are gray and patchy, and there are dark flakes where the last coat of stain lifted at the seams. You're trying to decide whether to start the washer or drive back to the hardware store for a gallon of stripper.
The wrong answer here costs you the whole job. Stain over the wrong prep peels in eight months. Strip a deck that only needed cleaning and you've spent a hundred bucks and four hours on nothing.
Here's how to tell which one your deck actually needs — and the order they go in if it needs both.
The first question isn't pressure or stripper. It's what's still on the boards.
Before you decide on a method, walk the deck and look at what's stuck to the wood.
If the surface is gray and dull but smooth, with no shiny patches and no flakes, you're looking at a weathered penetrating stain or a bare board that's never been finished. The old stain — if there was one — has worn down into the grain. A pressure wash plus a deck cleaner removes the gray surface fibers and exposes fresh wood underneath. No stripper needed.
If the surface has shiny patches, peeling flakes, or color that beads water in spots, you're looking at a film-forming finish that hasn't fully worn off. That includes most solid-color stains, semi-transparent stains with film-forming binders, deck paint, and any clear sealer that left a coating. Pressure washing alone won't lift the bond — it'll knock off the loose flakes and leave the rest. Stain applied over that mix peels in patches inside a year.
If you don't know what was used last time, the water test is the fastest answer. Sprinkle water on a few spots. If it soaks in within a minute, the old finish has worn off and pressure washing is enough. If it beads on the surface for more than two or three minutes, there's still a film up there. That film has to come off before stain bonds to wood again.
That's the whole diagnosis. The rest of the article is what you do once you know.
Pressure washing and stripping aren't doing the same job
A pressure washer cleans by hitting the wood with water — usually 1,200 to 1,800 PSI for decks, with a wide-fan tip held a foot back from the boards. It strips off dirt, mildew surface growth, weathered gray fibers, and pollen. On bare or worn wood, it opens the grain enough to take new stain.
A chemical stripper cleans by dissolving the bond between the old finish and the wood. Most deck strippers are sodium hydroxide-based (lye) or use sodium metasilicate. You brush it on, let it sit for fifteen to thirty minutes, and the old coating turns gummy. Then you rinse it off — usually with a pressure washer at low PSI — and the finish comes with it.
The two methods aren't interchangeable. Pressure alone can't break a chemical bond between a film-forming stain and the wood. Stripper alone doesn't remove weathered gray fibers or set the grain up to take a new stain. Most full-prep jobs on an older deck actually use both, in a specific order.
Fix the boards before you fix the finish
Before either method goes on the deck, walk it on your hands and knees. Pop heads on screws that backed out. Replace boards that are spongy at the corners or split through the middle. Set nails that have lifted above the surface. A pressure washer hitting a loose nail tends to pull it the rest of the way out and pit the wood around the head.
Stain doesn't hide damage. It accentuates it. A board with a soft spot the size of a quarter looks fine under gray weathering and looks terrible under fresh stain because the new finish absorbs darker where the wood is degraded. If a board has structural issues, swap it before prep day. The replacement board will weather to match within a season once it's stained the same color.
The sequence that gives you a finish that holds
If the deck needs both stripping and pressure washing, the order matters. Reverse it and you waste the stripper.
| Step | What you're doing | Why this position in the sequence |
|---|---|---|
| 1. Spot test | Test stripper on a 1-square-foot patch | Confirms the product softens the finish before you commit to the whole deck |
| 2. Wet down adjacent plants and siding | Soak everything within 6 feet | Stripper damages foliage and bleaches paint if it sits |
| 3. Apply stripper | Brush or pump-spray on, work in 4x8 sections | Working in sections keeps the product wet long enough to act |
| 4. Dwell time (15–30 min) | Keep it wet — mist with water if it dries | A dried stripper does nothing and is harder to rinse |
| 5. Agitate with a stiff brush | Scrub the gummy finish in the direction of the grain | Breaks the surface tension so the rinse can lift the product |
| 6. Pressure wash rinse (low PSI) | 800–1,200 PSI, wide tip, held 12–18 inches off the wood | Lifts the dissolved finish and the gray surface fibers in one pass |
| 7. Apply a deck brightener | Oxalic acid-based, brushed on, rinsed after 10 minutes | Neutralizes the high pH from the stripper and lightens the wood |
| 8. Let the deck dry 48–72 hours | Moisture meter below 15% before staining | Stain on wet wood traps the moisture and peels |
| 9. Light sand if grain raised | 60-grit on a pole sander | Knocks down any fuzz from the rinse |
| 10. Apply stain | Two thin coats per the product instructions | New finish bonds to wood, not to a film |
Skip the brightener and you'll stain a deck that's still chemically alkaline from the stripper. The stain looks blotchy on day one and fades unevenly over the next season. Skip the dry time and the stain traps moisture under the surface — six weeks later, the boards look milky where the finish couldn't breathe.
If the deck only needs pressure washing (worn penetrating stain or bare wood), the sequence is shorter: clean with a deck cleaner, pressure rinse at low PSI, brighten if the boards still look dark, let dry 48 hours, stain. Same care with the rinse, no stripper.
The weather matters at two points. Pressure wash on a dry day in the 50–80 degree range — too cold and the cleaner won't react, too hot and it dries on the wood before you can rinse it. If rain is in the forecast within 48 hours of staining, push the staining out until you have a clear window. A stain that gets rained on before it cures sheets off in beads and leaves a finish that never sets right.
Why pressure washing alone fails on film-forming stains
This is where most DIY deck projects go sideways. The homeowner rents a pressure washer, gets the deck looking lighter and cleaner than it was, applies new stain, and watches it peel by spring.
The reason: a film-forming stain doesn't sit on the wood. It sits in a thin layer above the wood, bonded chemically to the surface fibers. Pressure washing knocks off the loose, peeling, sun-damaged sections. The intact sections — the ones still bonded — stay put. Water can't break that bond. Even at 3,000 PSI, you'd damage the wood long before you'd lift a healthy film.
What you end up with after a pressure-only pass on a film-finished deck is a patchwork: bare wood where the old stain had already failed, and intact film where it hadn't. New stain applied over that mix has two completely different surfaces to bond to. It absorbs into the bare patches and sits on top of the film patches. Within one freeze-thaw cycle the film patches lift, and the stain comes with them.
A stripper releases the bond chemically. Then the pressure wash lifts the released material and the gray fibers in one rinse. That's why the order — strip first, then pressure rinse — exists.
When stripping is overkill
Not every deck needs the full strip. A few situations where pressure washing alone is the right call:
A deck stained with penetrating oil stain (the kind that soaks into the wood, no film, no sheen). After two to three years in Maryland weather, the stain has faded into the grain. There's no film to lift. A deck cleaner plus a low-PSI rinse opens the grain and you're ready to recoat.
A brand-new deck that's never been stained. The wood needs to weather for a few months and then get a light pressure wash to remove mill glaze and any pollen or surface dirt before the first coat. No stripper to apply because there's no finish.
A fence panel or rail that's seen one coat of penetrating stain and looks gray. Same answer as the penetrating-stain deck. Stripper here is wasted product.
A composite deck. Composite isn't wood and shouldn't be stripped or stained. It needs a soft wash with a mild cleaner — different method covered separately.
When in doubt, the water-bead test tells you which path you're on. Beading equals stripping. Soaking equals pressure washing.
What goes wrong when you skip a step
The patterns we see most often when a homeowner shortcuts the sequence:
Stain peels in patches within a year. Film-on-film bond failure. Pressure wash lifted some of the old finish but not all, and the new stain bonded to a partial surface. The patches peel along the line of the old stain edges.
Boards look gray under fresh stain. No brightener used. The stripper raised the pH of the wood, the brightener step got skipped, and the stain absorbed unevenly into the alkaline surface.
Deck looks muddy or blotchy after staining. Wet wood. Either the deck didn't dry long enough after the rinse, or it rained the day before and nobody used a moisture meter. Stain on a wet board ends up cloudy.
Wood feels fuzzy after pressure washing. Pressure held too close, or PSI set too high. The grain raised. Light 60-grit pole sanding before staining fixes it.
The whole deck looks worse than before. Two causes. Stripper allowed to dry on the wood, or pressure washer held too close and gouged the soft summer-growth rings.
None of these come from picking the wrong product. They come from doing the right method in the wrong order, or skipping the middle steps — the dwell time, the brightener, the dry time.
How to tell which path you're on before you spend money
If a contractor quotes your deck with one line item — "pressure wash and stain" — ask which prep path they're using and why. The honest version involves a quick water-bead test. The dishonest version is a flat "we pressure wash everything."
Pressure washing a film-finished deck before staining is the most common shortcut in the deck-prep business. Faster on the day of, the customer sees a cleaner-looking deck, and the failure shows up two seasons later — long enough that the contractor's done with the warranty conversation.
A real deck and fence cleaning quote looks at the existing finish, picks the method, and writes the sequence on the quote. The difference between a $400 wash-and-stain and a $900 strip-brighten-stain isn't padding. It's two different jobs.
Frequently Asked Questions
The order is the answer, not the product.
A deck that holds new stain isn't a deck that got the most aggressive cleaner. It's a deck where the right method went on the boards in the right order, with the brightener and the dry time in between. Skip either of those middle steps and the finish peels.
If your boards bead water, plan for a strip. If they soak it in, plan for a pressure wash plus a cleaner. Either way, brighten before you stain, and don't pick up the brush until the moisture meter reads under 15 percent.
The difference between a deck that looks good for three years and one that peels by spring is almost always in the prep sequence. Not the stain.
Superior Power Washing handles wood deck cleaning, stripping, and prep before staining across Waldorf, MD, and all of Charles County and Southern Maryland — including Clinton, Fort Washington, Upper Marlboro, Bryans Road, and Accokeek. We diagnose the existing finish before we start, sequence the prep the way it needs to go, and brighten every deck before we hand it off for staining. Call (240) 901-4252 for a free on-site assessment.