
How to Clean Vinyl Siding Without Wrecking It
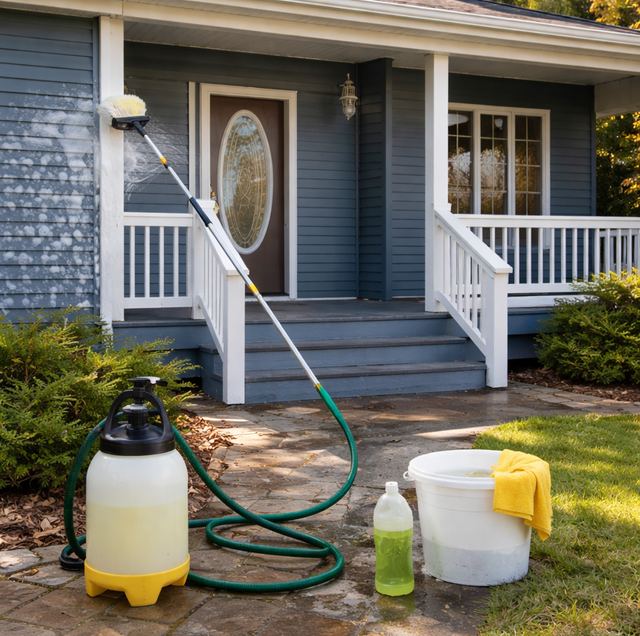
Quick Answer: Vinyl siding gets dirty mostly from a living film of algae, mildew, and mold, plus trapped dirt and pollen. The safe fix is a low-pressure soft wash with a cleaning solution that kills the growth, worked top to bottom. High pressure looks faster but drives water behind the panels and can gouge the surface, so skip the heavy wand.
What Those Green and Black Streaks Actually Are
The gray-green haze and dark streaks creeping across a wall are rarely just dust. Most of what dulls vinyl siding is a biofilm, a thin living layer of algae, mildew, and mold that anchors to the surface and feeds on airborne spores, pollen, and the fine organic dirt that settles out of the air. Once it takes hold, it spreads outward in the same streaky pattern you see on north-facing walls and shaded corners.
That distinction changes everything about how you clean. Plain dirt rinses off. A biofilm does not, because the growth has a grip on the surface and keeps regrowing from whatever you leave behind. You can blast the visible layer away with a strong stream of water, and the wall will look clean for a few weeks; then the streaks return darker than before because the roots were never killed. The goal is not to scour the panel. The goal is to kill the growth and lift it, then rinse the dead residue off.
Shade and moisture are what feed the growth, and both are present in some form all year. A wall tucked behind a tree line or under a wide eave stays damp and dim in July just as it does in January, so this is not a one-season problem you can time around. Cleaning the biology, not chasing the weather, is what keeps a wall clear.
Why High Pressure Is the Wrong Tool for Vinyl
Vinyl siding is built as an overlapping system, not a solid skin. Each panel laps over the one below it, and the whole assembly hangs loosely on the wall so it can expand and contract with temperature. Behind it sits a moisture barrier and the wall sheathing. That layered design sheds rain running down the face beautifully. It is not built to keep out water shoved at it sideways or upward under force.
A pressure washer throws water at a velocity rain never reaches. Aim that at a lap seam, a window flange, or a J-channel, and the stream finds the gaps, pushing water behind the panels and into the wall cavity. Trapped moisture there has no easy way out, and it becomes exactly the dark, damp habitat that mold and rot want. You can create a hidden moisture problem while the outside looks spotless.
High pressure damages the vinyl itself too. A tight, close nozzle can gouge or crack an aging panel, and it strips the fine oxidized chalk layer unevenly, leaving cloudy streaks and dull patches that no amount of rinsing fixes. Older siding that has already chalked is especially easy to mar. The stream is also a real injury hazard at close range, capable of cutting skin, so it is not something to wave around casually near your own hands and feet.
Soft washing solves the same problem from the other direction. Instead of relying on force, it relies on chemistry: a cleaning solution wets the surface, kills the algae and mold, and loosens the film, then a gentle rinse carries it away. Think of it as letting a soak do the work a stiff scrub never could, the way a pan crusted with baked-on food comes clean after it sits in soapy water instead of being attacked dry. Low pressure, right cleaner, patience.
The Safe Way to Clean Vinyl Siding, Step by Step
Choose your approach: light dirt vs. real growth: For a lightly dusty wall with no green or black streaking, you may not need chemicals at all. A bucket of water with a little dish soap, a soft-bristle brush on an extension pole, and a garden hose will handle surface dirt and pollen. Work in small sections and rinse before the soap dries.
When you can see algae, mildew, or dark streaks, plain soap will not kill it. That calls for a soft-wash mix built around a mildewcide. A common approach is a diluted sodium hypochlorite solution with a surfactant that helps it cling to the vertical surface long enough to work. Whatever you use, mix to the label ratio and never combine bleach-based cleaners with anything containing ammonia or acid, because that reaction releases toxic gas.
Work top to bottom, and understand the lap direction: Clean from the top of the wall downward so dirty runoff always flows over surfaces you have not cleaned yet, not over finished ones. Apply the cleaning solution, give it the label's dwell time so it can kill the growth, and keep the surface wet the whole time. If it dries, streaks set in.
Here is the part people get backward. When you rinse, water and spray naturally want to go up under the laps if you angle the nozzle upward, and that is the one direction you must avoid. Each panel laps over the one below, so spraying upward drives water straight up behind the panel into the wall, the exact path you are trying to protect.
When you rinse, never angle the nozzle upward under the laps. Each panel laps over the one below, so upward spray drives water behind the panel into the wall. Rinse downward and across so the water sheets down the face the way rain does.
Rinse thoroughly and check your work: Rinse each section completely before moving on, top to bottom, until the runoff is clear. Pay attention to window frames, trim, and the underside of laps where residue hides. A cleaner left to dry on the surface can leave its own film, so a full rinse matters as much as the wash.
Protecting Plants, Windows, Gutters, and Yourself
Any cleaning solution strong enough to kill mold is strong enough to burn foliage. Wet down every plant, shrub, and patch of lawn near the wall before you start, cover the most sensitive ones, and rinse them again afterward so nothing sits on the leaves. Contain runoff and keep it away from garden beds and storm drains rather than letting concentrated solution pool where it can do harm.
Water and electricity are a shock hazard, so treat every exterior outlet, light fixture, meter, and panel as a hazard. Avoid spraying directly into them, and do not soak fixtures you are unsure about. Windows and their seals deserve care too: keep pressure low around glass and flashing, and do not force water at the frames where it can get behind them.
Do not overlook the gutters and fascia. The same streaking that stains siding builds up on gutter faces and the fascia board behind them, and a soft-wash pass over those surfaces finishes the look. Rinse them the same careful way, avoiding upward spray where the fascia meets the roof edge.
Never use a pressure wand from a ladder. When you pull the trigger, the wand kicks back from the recoil, and on a ladder that shove is enough to put you on the ground. Soft washing lets you reach higher from the ground with a pole, keeping you off the ladder for most of the wall.
When to Bring in a Pro
Some walls are worth handing off. A two-story elevation means the upper reaches are past what most homeowners can safely cover from the ground, and doing it well without a ladder-and-wand mistake takes the right pole gear and technique. Heavy, established growth that has darkened and spread across large sections also needs a properly mixed soft-wash system and enough dwell control to kill it in one pass rather than half-treating it and inviting faster regrowth.
A pro also reads the wall: which sections are chalked and fragile, where old caulk or a failing window flange means water intrusion is already a risk, and how to protect mature plantings while still getting the wall clean. If you are unsure whether the streaking is surface algae or something growing in the substrate behind a damaged panel, that judgment call is worth a professional set of eyes before anyone sprays anything.
Frequently Asked Questions
Most walls do well with a full soft wash every one to two years, but the shaded, damp sides usually need it sooner than the sunny ones. A useful marker: once you can see faint green tinting on the north or tree-side wall, the biofilm is already established, and it is time, rather than waiting for heavy black streaks that take longer to kill.
Household bleach can knock back mildew, but kitchen bleach lacks a surfactant, so it sheets straight off vinyl before it can work and gives uneven results. Soft-wash mixes add a surfactant precisely so the solution clings to a vertical surface for its dwell time. Never pair any bleach with an ammonia glass cleaner or an acid cleaner, since that combination produces toxic gas.
Pre-wetting and post-rinsing protect most plants, but broadleaf evergreens and tender new growth are the most sensitive and can still spot if solution sits on them. Watering the root zone heavily before you start dilutes any drift that reaches the soil, and covering a prized shrub with a tarp for the twenty minutes of active spraying is cheap insurance.
Trim and caulk lines collect growth because water lingers there. Let the cleaning solution dwell a little longer on those spots and agitate gently with a soft brush rather than raising pressure. If caulk is cracked or pulling away, clean around it but note it for repair, since a failed seal is a water-entry point no washing can fix.
Not quite. A black soft-wash nozzle widens the fan and drops the pressure at the surface, which helps, but real soft washing is defined by the chemistry doing the work, not just a gentler tip. You still want a proper mildewcide mix and correct dwell time; the nozzle only controls how hard the water hits, not whether the growth actually dies.
Yes. The algae and mold in the biofilm hold moisture against the panel and, over years, can work into micro-cracks and around fasteners, and organic growth can contribute to premature aging of the surface. Clearing it also lets you spot loose panels, gaps at the J-channel, and staining that signals a leak, so a wash doubles as an inspection.
Skip the ladder and the guesswork — book a low-pressure soft wash that lifts the growth without forcing water behind your siding. Superior Power Washing serves Waldorf, La Plata, and Clinton. Call (240) 901-4252.
